Google Maps Introduces New Travel Planning Features
Recently, Google has launched a series of features aimed at simplifying the travel planning process. These enhancements include hotel price tracking and the use of AI as a personal assistant. A notable addition allows users to extract address data from screenshots and save it directly into google maps.
This feature is being rolled out gradually. Users began noticing it this week, and Google has provided guidance on how to activate it through a blog post. Currently, this update is available for iOS devices, with an Android version expected soon.
Importance of the New Feature
Many travelers often take screenshots of search results or social media posts related to their trips. This method is swift and effective for saving important details when there’s no time for note-taking. One user shared their excitement about this feature: “Wow! This new function can scan screenshots and save locations—something I’ve needed for ages since I have so many random screenshots.”
When users revisit these saved images, they typically utilize Google Lens to pull text from the screenshots. They then store this information in planner notes or custom lists within the “You” section of Google Maps.
With gemini's help, AI will now automatically search your phone's saved screenshots for relevant details and compile them into a special list within the app. According to Google's declaration in March, “Places you save will show up on the map, making it easy to share with friends.”
This function operates similarly to Gemini’s ability to analyze files. For example, when you open a PDF document in your Files app, you'll see a Gemini chip that allows you to ask questions about its content—a feature that works effectively.
Steps to Activate Screenshot Scanning
To enable Gemini’s screenshot scanning feature for adding addresses into Google Maps:
- Ensure you have the latest version of the Google Maps app installed on your iPhone.
- Open the app and tap “You” located at the bottom menu.
- On this page, look for a new list labeled Screenshots with a “Try it out!” badge.
- Tapping on this option will display a short tutorial video explaining how it effectively works; you'll need permission for access to local media files stored on your device.
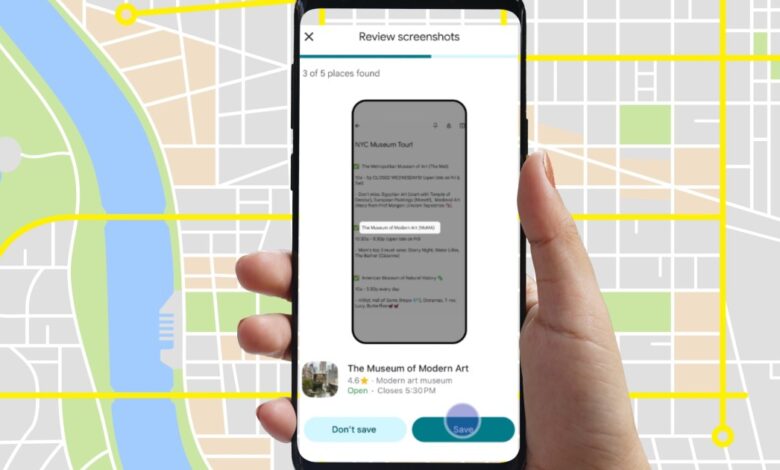
- After taking any screenshot containing address-related details, it will be scanned automatically next time you open Google Maps; you'll receive notifications about new location data ready for review.
- You can select which addresses you'd like saved; they’ll then be added directly into your list automatically—there's also an option for manual scanning within “You.”
- The addresses you've saved will appear both in your Screenshots list and visually represented on maps.
By following these steps carefully, users can considerably streamline their travel planning process while keeping all necessary location details organized efficiently within one platform—Google Maps makes managing travel easier than ever before!